Vapi Meta Lead Ads Integration
Using LeadSync's Vapi Integration, you can now follow-up Facebook and Instagram leads with an AI Voice Agent for further qualifying leads or to book sales calles.
Adding a Vapi Connection to LeadSync
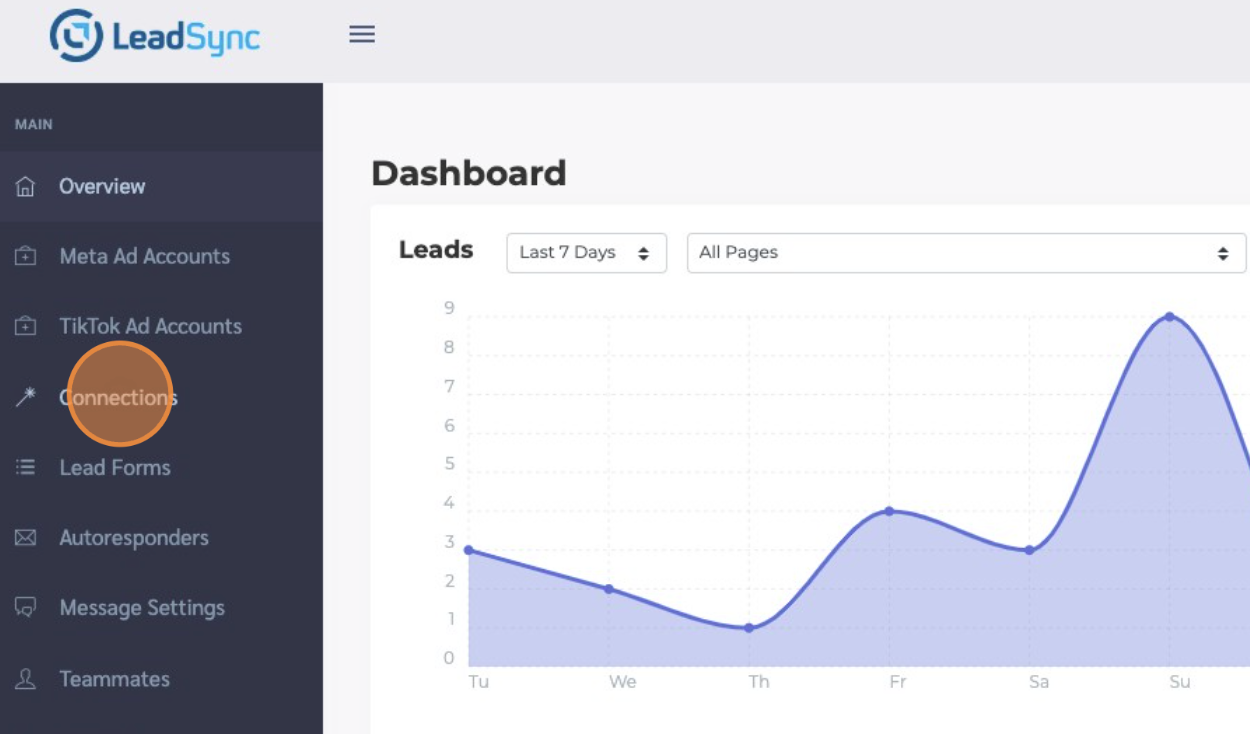
- From your LeadSync admin area, click "Connections".
-
Click the "Add Connection" button
-
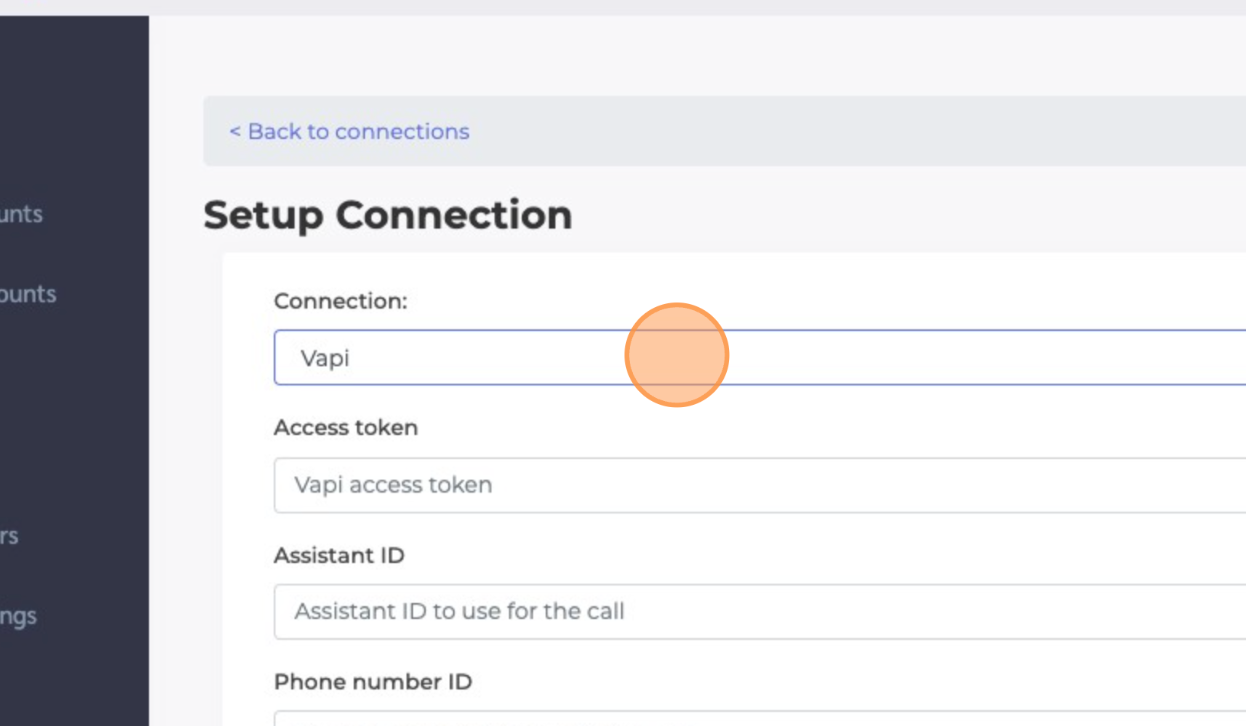
Select "Vapi" form the connection dropdown.
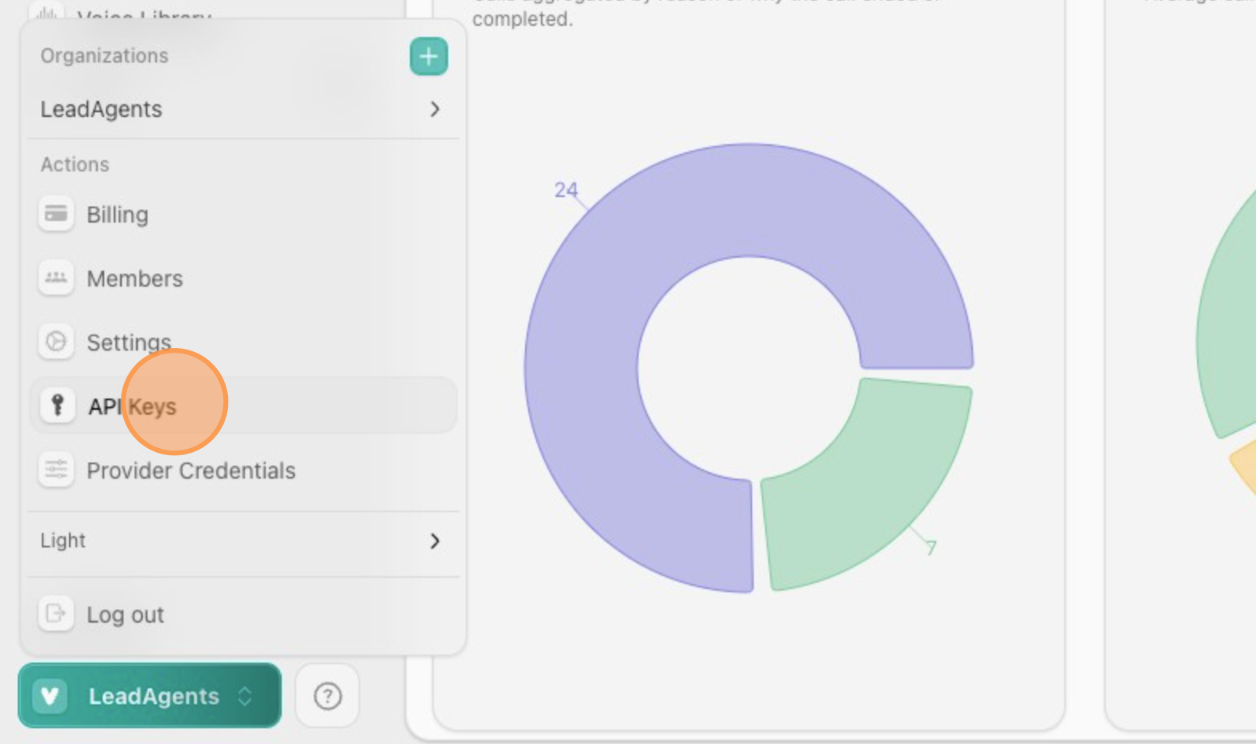
- From your Vapi dashboard, make sure you select the Organisation you're working on, then go to the API Keys section.
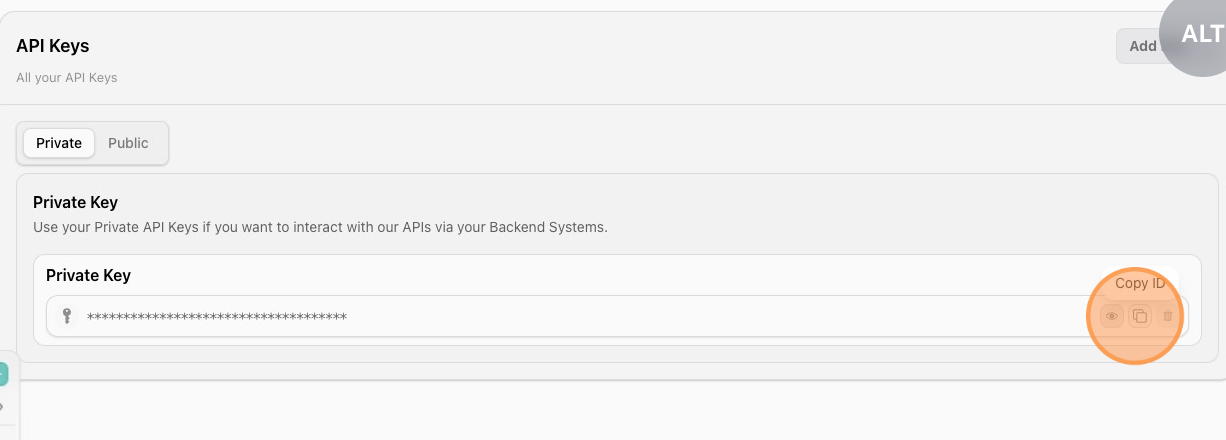
- Copy the Vapi API key.
- Back in LeadSync, past your Vapi API key into the Access token section.
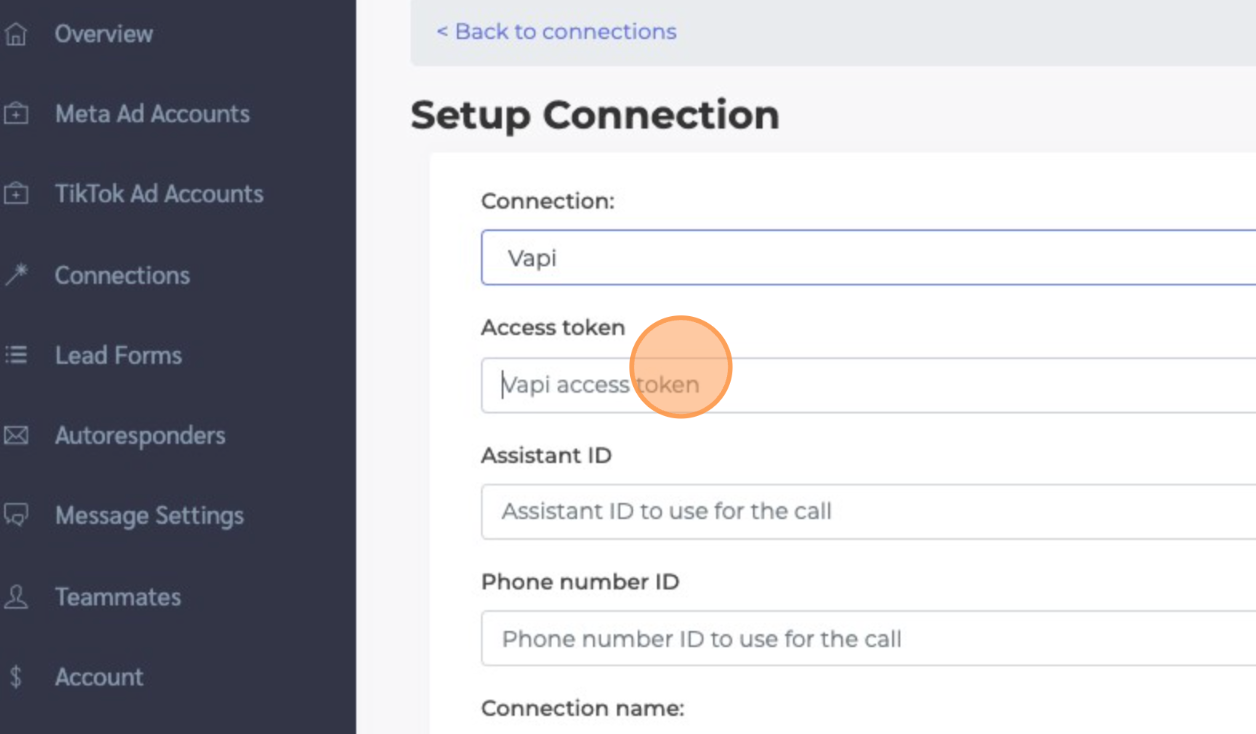
- Back in your Vapi account, find the Assistant you've created ad copy the Assistant ID.
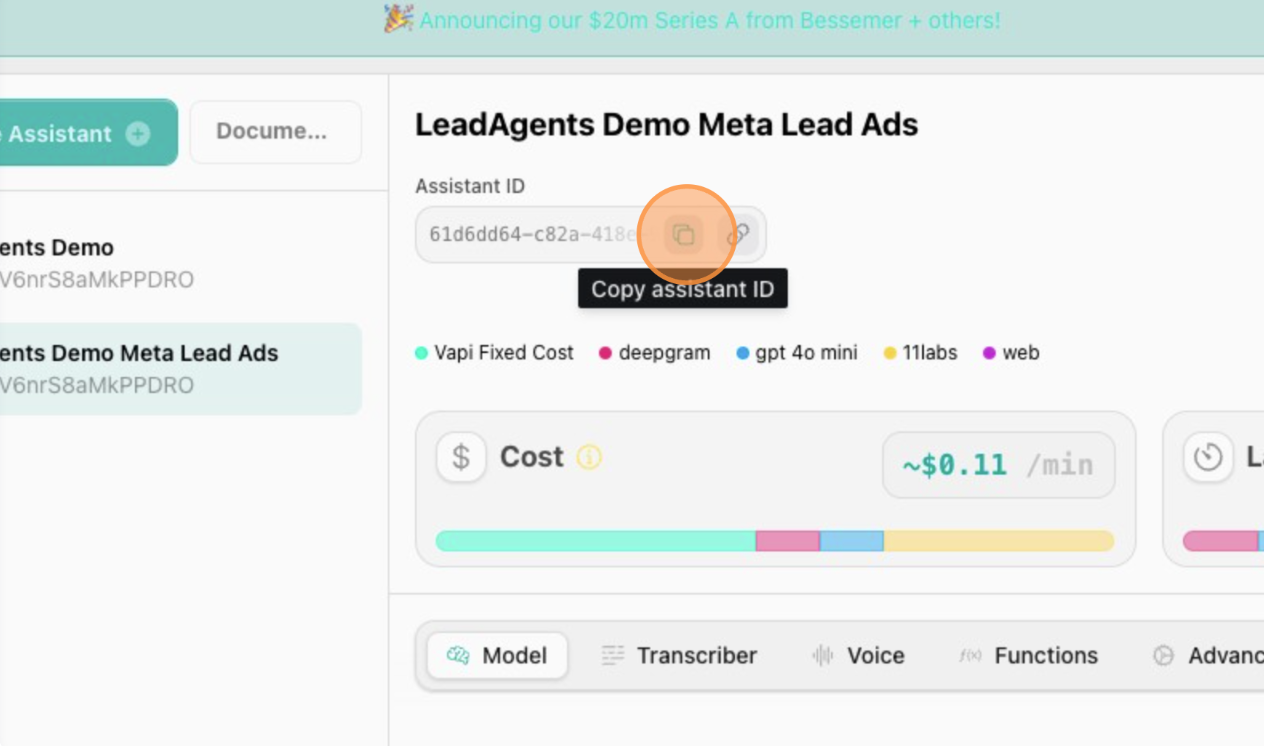
- Paste the ID into the "Assistant ID to use for the call" field.
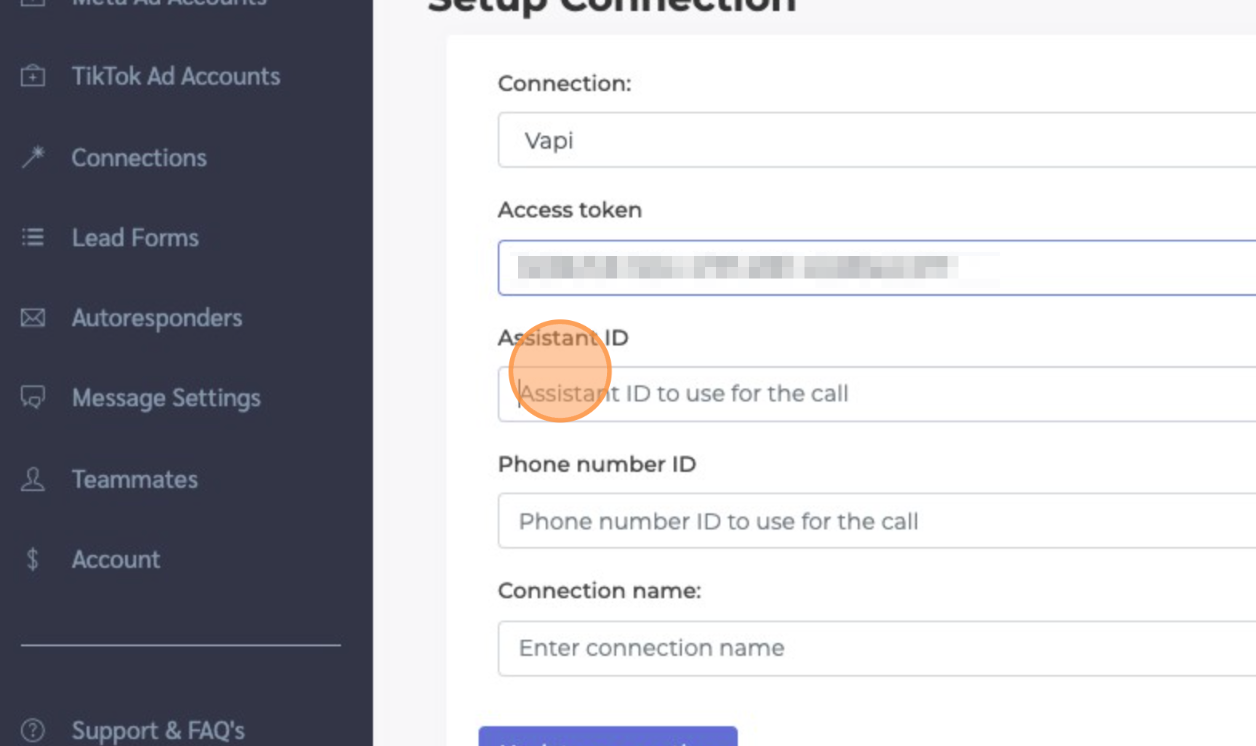
- Find the phone number you with to use to call leads (you will have to import this from Twilio first)..
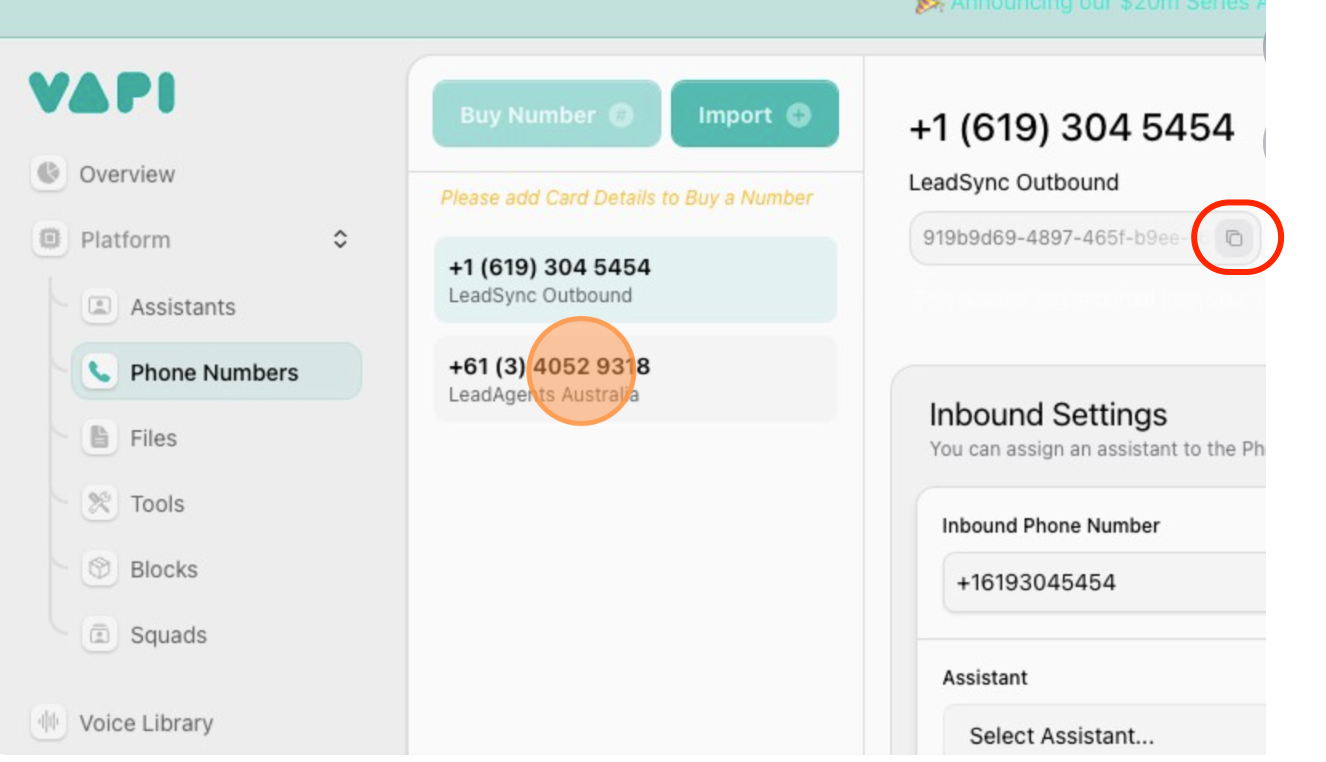
10.Paste the Phone ID into the Phone number ID field in LeadSync.
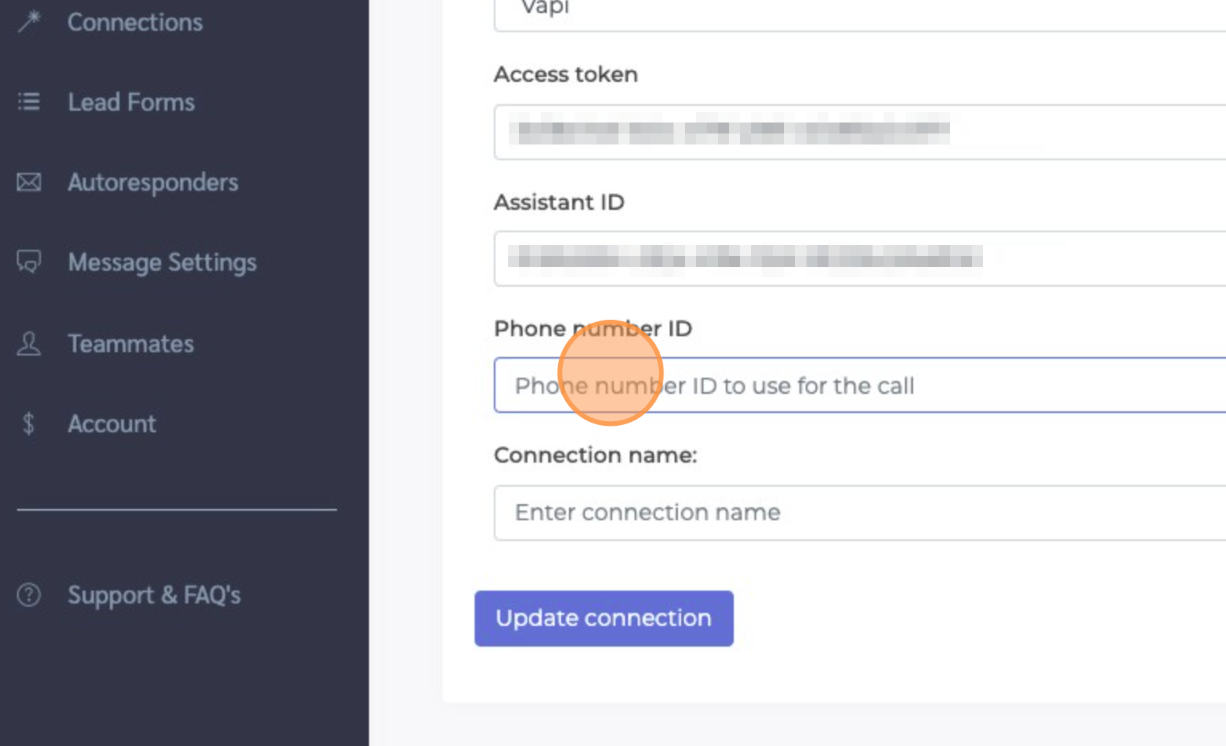
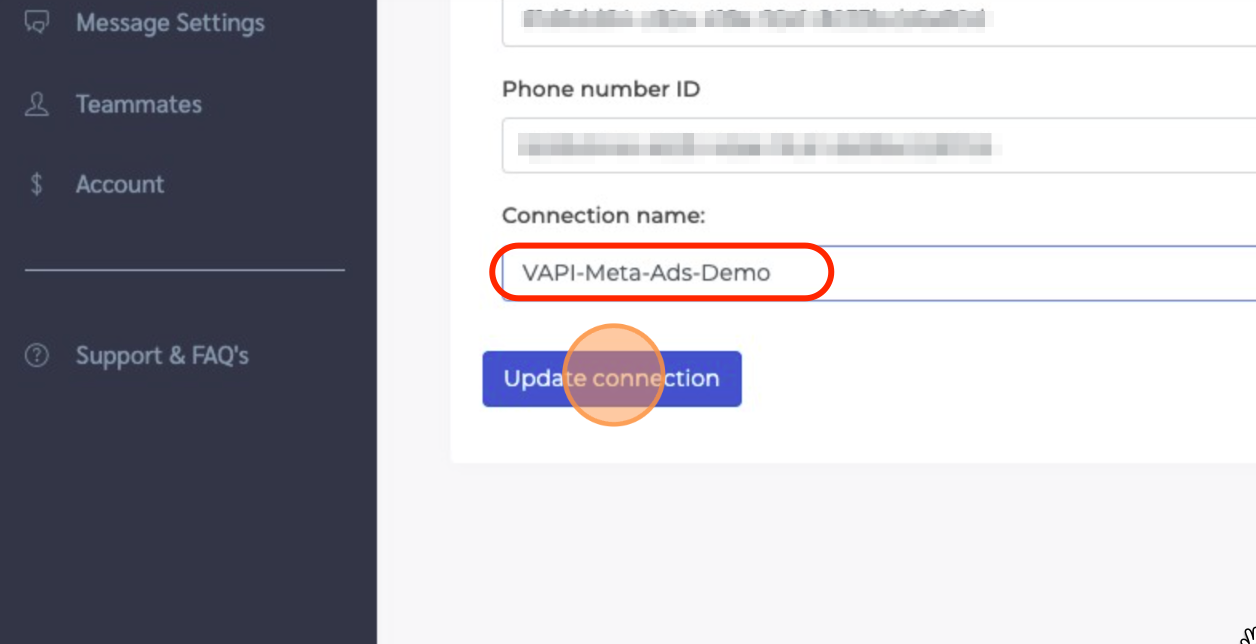
- Name your VAPI connection - this is for your own internal purposes, then click *Update connection" to save.
Connecting a Meta Lead form to a Vapi
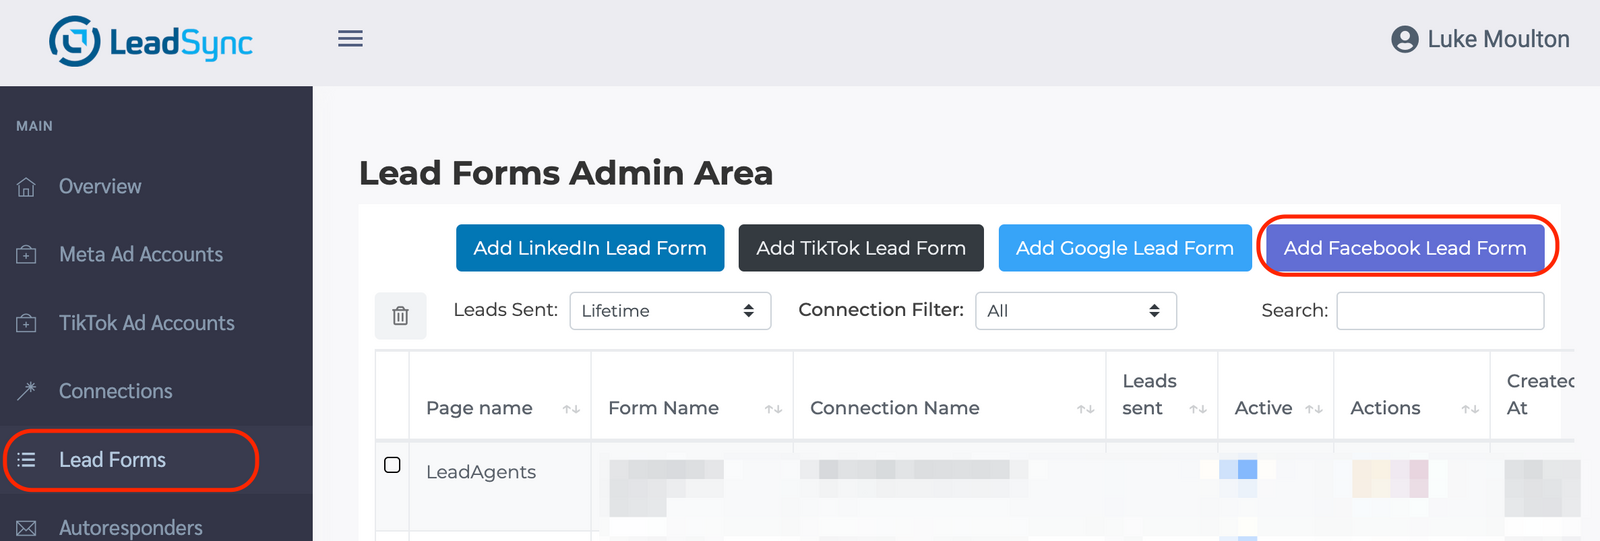
- Now go to the "Lead Forms" section LeadSync and click then Add Facebook Lead Form button.
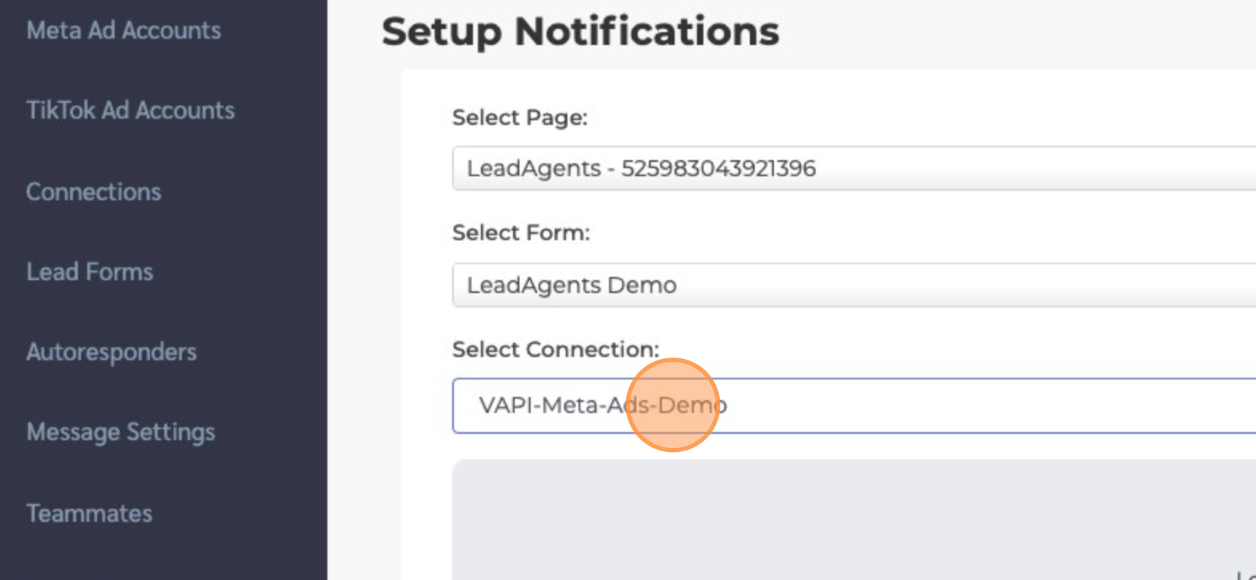
- Select your Page, the Lead Form you're using in your campaign and the Vapi connection you just created.
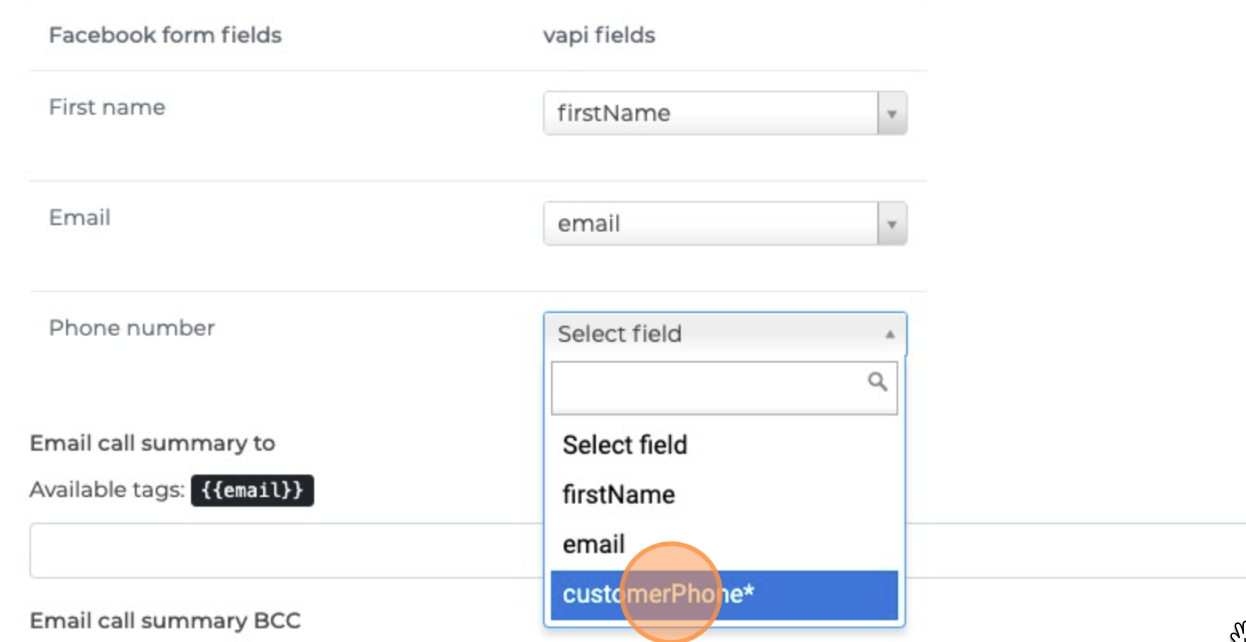
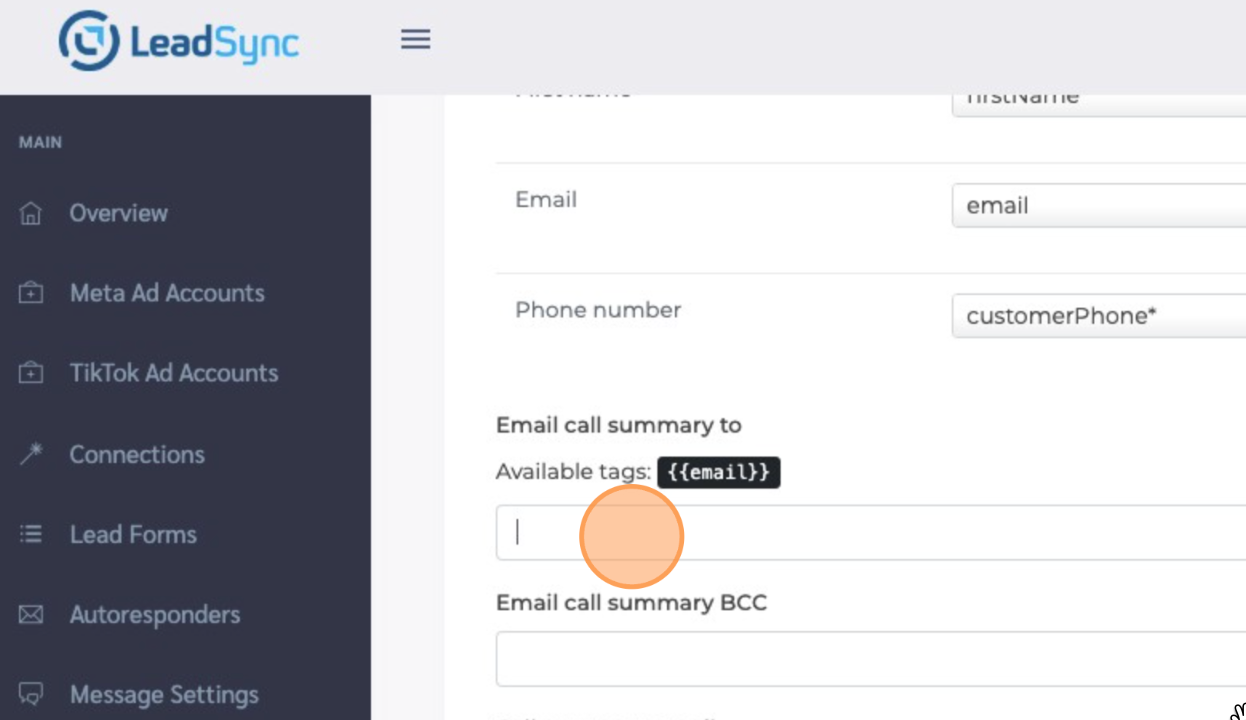
- It's time to map your Meta Lead form fields to the fields available in Vapi. Start with the first name - so the Voice agent can address the caller with their name. Then map the other fields from your form to fields you've added to Vapi.
- PLEASE NOTE: LeadSync will allow mapping against template variables in the prompt text.
- Now you can customise the call summary. If you wish to send the Lead a follow-up email to the lead, you can add the [[email]] token to first email call summary field. You can also BCC someone.
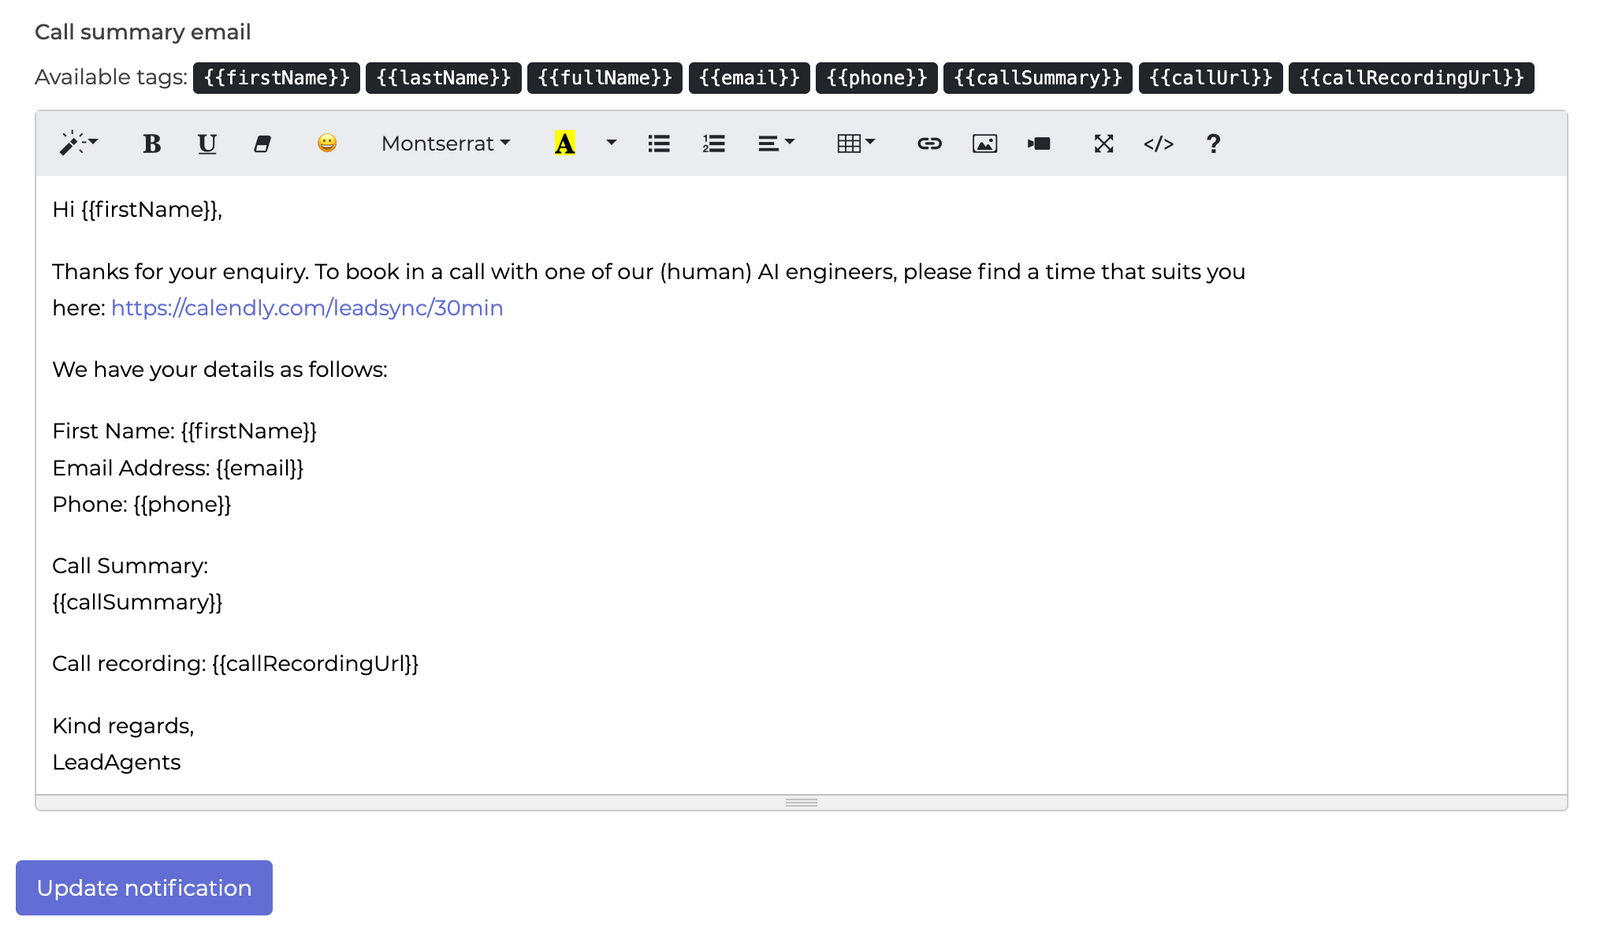
- Customise the call summary email using the tokens provided.
Test your Vapi Meta Forms Integration
- To create a test lead and initiate a call, here's how to create a test lead. You should receive a call from your Vapi voice agent within around 30 seconds. Once the call has finished, you should also receive a call summary email.
Connect Facebook / Meta Leads to Vapi
Start syncing leads from your ad platform in under 2 minutes. No credit card required.
Start Free Trial